6 Helpful Hints to Easily Carve a Pumpkin for Halloween

Salt Dough Ghosts, Bats, Pumpkins and other things
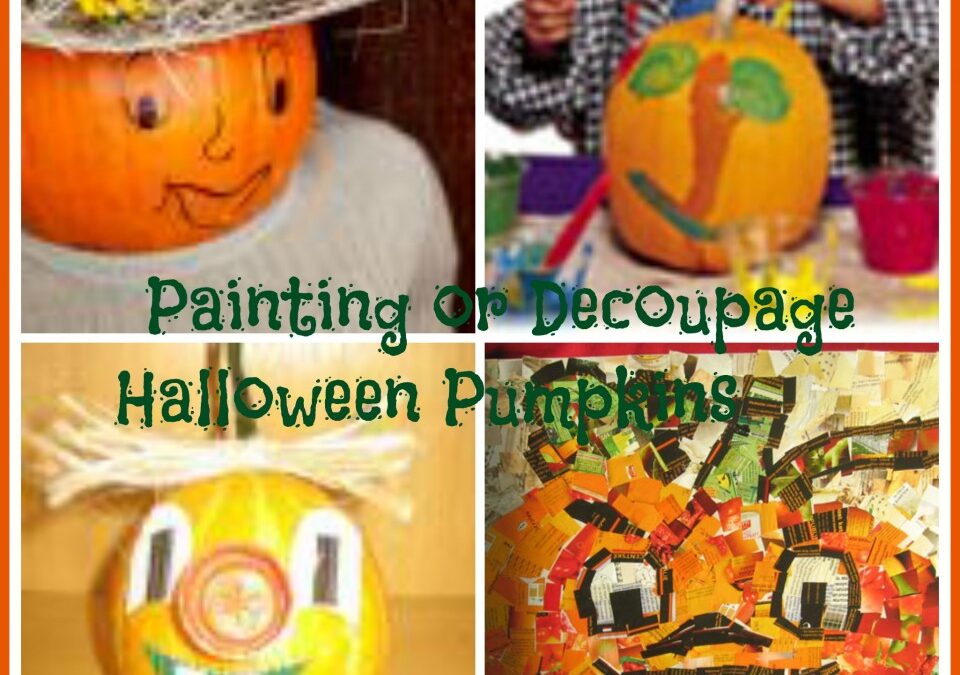
Do you find it too difficult to carve a pumpkin? Here are some kid-friendly ways to decorate your pumpkin without using a knife. These ideas use paper scraps, paint, glue and other crafty bits and bobs. You can even use those cheaper, less than perfect looking pumpkins for these as you are going to cover them anyway.
Table of Contents
Painting Halloween Pumpkins
What you need:
- Pumpkins
- Tempera “Poster Paints” or acrylic paints
- Brushes
- old empty Yoghurt containers
- Newspaper or wipe clean cloth
- PVA glue (optional)
- Cover a table with newspaper or a wipe able cloth.
- If your child is older, allow them to design their pumpkin decoration by first drawing on the pumpkin with a marker.
- Put out the paints and brushes and let your child paint and decorate their pumpkin however they like. To help the paint from cracking and flaking, add a little PVA glue to the paint and mix it in. It will help it not to crack and give it a glossier finish.
- These should last as long as the pumpkin does…so remind your child that as the pumpkin rots away, they will lose their artwork and that it is temporary or you may be faced with tears!
Painting Pumpkins
What you need:
- Pumpkins
- Tempera “Poster Paints” or acrylic paints
- Brushes
- Yoghurt containers
- Newspaper
- Masking tape for shapes
- Pencil or thin marker pen.
What to do:
- Cover a table with newspaper (tape it down with masking tape so it stays covered).
- Set out liquid tempera paints, paintbrushes and plastic yogurt containers filled with water for rinsing the brushes.
- Let the kids paint goofy or creepy faces on the pumpkins.
Decoupage Pumpkins for Halloween
This simple craft is a great activity for a group and even the littlest hands can help tear the paper into small pieces.
- pumpkin
- Different coloured thick tissue paper or other bright wrapping paper ( you can use magazine scraps too)
- Paintbrushes
- wipe clean table cloth or newspaper to protect the table
- Mod Podge or watered-down white PVA glue
- Tear the paper into squares and glue them in place. Overlap the different colours.
- You can even cut out whole images to stick on it! Think: bats, cats, moons, witches etc
- A topcoat of Mod Podge or PVA will help the paper to stay smooth and shiny and not to peel off.
- Again, this will last as long as the pumpkin does, don’t be disappointed when the pumpkin eventually rots and you have to throw out your masterpiece!
Both these activities are very small-child-friendly and I would recommend them in place of carving. Minimal preparation also means that you have the time to really get stuck in with the children and make something special.
Painting or decoupaging pumpkins as decorations for Harvest or Halloween is loads of fun and also an alternative to carving them. Have lots of fun with your under 5” by trying out these “no sharp objects” ideas!
This simple craft is a great activity for a group: and even the littlest hands can help tear the paper into small pieces.
What you need:
- Real or artificial pumpkin
- Different colored thick tissue paper or other bright wrapping paper
- Paintbrushes
- Mod Podge or watered-down white glue (PVA)
What to do:
- Gather paper, several paintbrushes, and a container of Mod Podge or watered-down white glue.
- Working on a protected surface, simply tear the paper into squares and paste them in place. Overlap the different colours.
- You can even cut out shapes from our free downloadable templates and stick bats and cats and other black shapes on it!
- A topcoat of Mod Podge or PVA glue gives a good durable finish.
I hope you have found some inspiration for decorating pumpkins this Halloween. It’s fun, simple and safe for even your youngest child.
I am a preschool and primary school teacher and mum to 3 children. I have been involved in education since 1997 and have trained in a variety of educational specialist areas. It is with this expertise that I write articles to help parents and educators provide quality learning experiences for the children in their care.


